
As a disclaimer, the Fret-Me-Not is affiliated with any similar products on the market. When I was designing the Fret-Me-Not, I had believed it to be an original creation, with no knowledge of any existing models.
If you want to check out a succinct version of my product story, please feel free to check out my photo essay here!
As a designer, one of my greatest passions is to determine an accessible way for people who may be unlike me, whether in physical or cognitive capabilities, to engage with the world as I do. As I am an avid lover of art and music, these are two of the primary ways through which I want to tackle this challenge. When tasked with designing and manufacturing a project for my ME 103 course, I wanted to take the first step towards my goal for accessible and inclusive art and music.
When the stay-at-home order was enacted in 2020, I started trying to learn how to play the guitar. I fumbled around with a couple of strings and chords, but whenever I would make any headway, my fingers would develop callouses. I would become discouraged from continuing with my guitar-learning process, and my guitar would continue to collect dust in the corner of my room. When my callouses heal, I would redevelop interest and continue this cycle over again. Reflecting on my experiences, I was concerned for those who might be like me–looking to learn how to play the guitar but barred from doing so because of personal physical circumstances or a lack of desire to deal with pesky callouses.


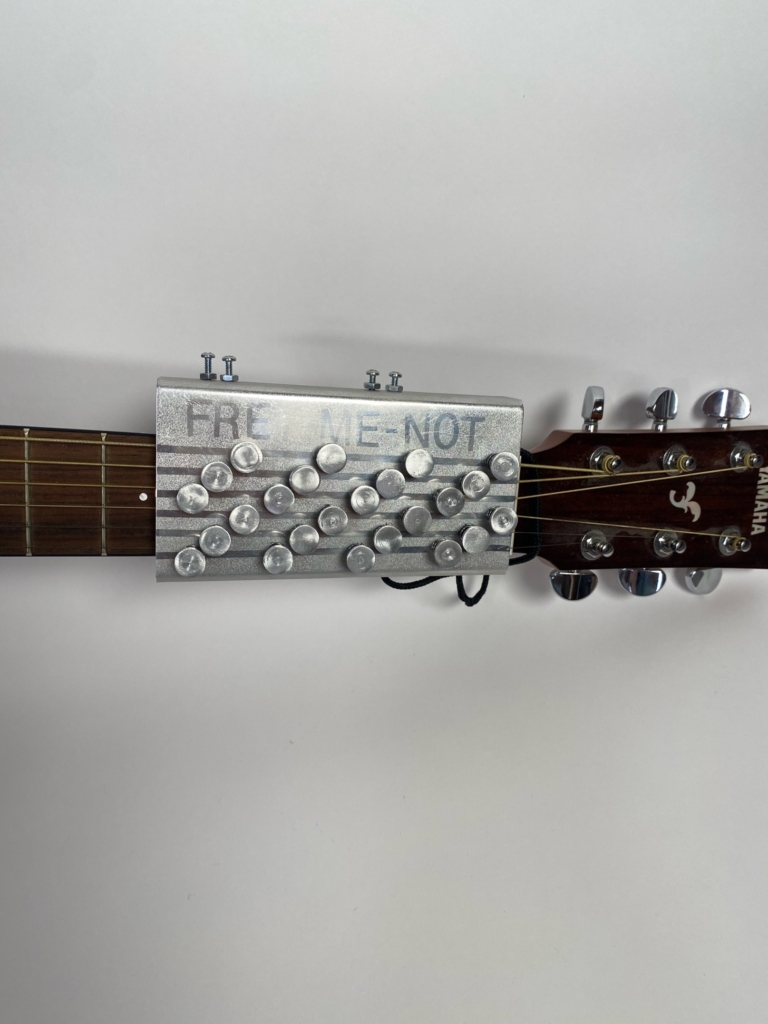
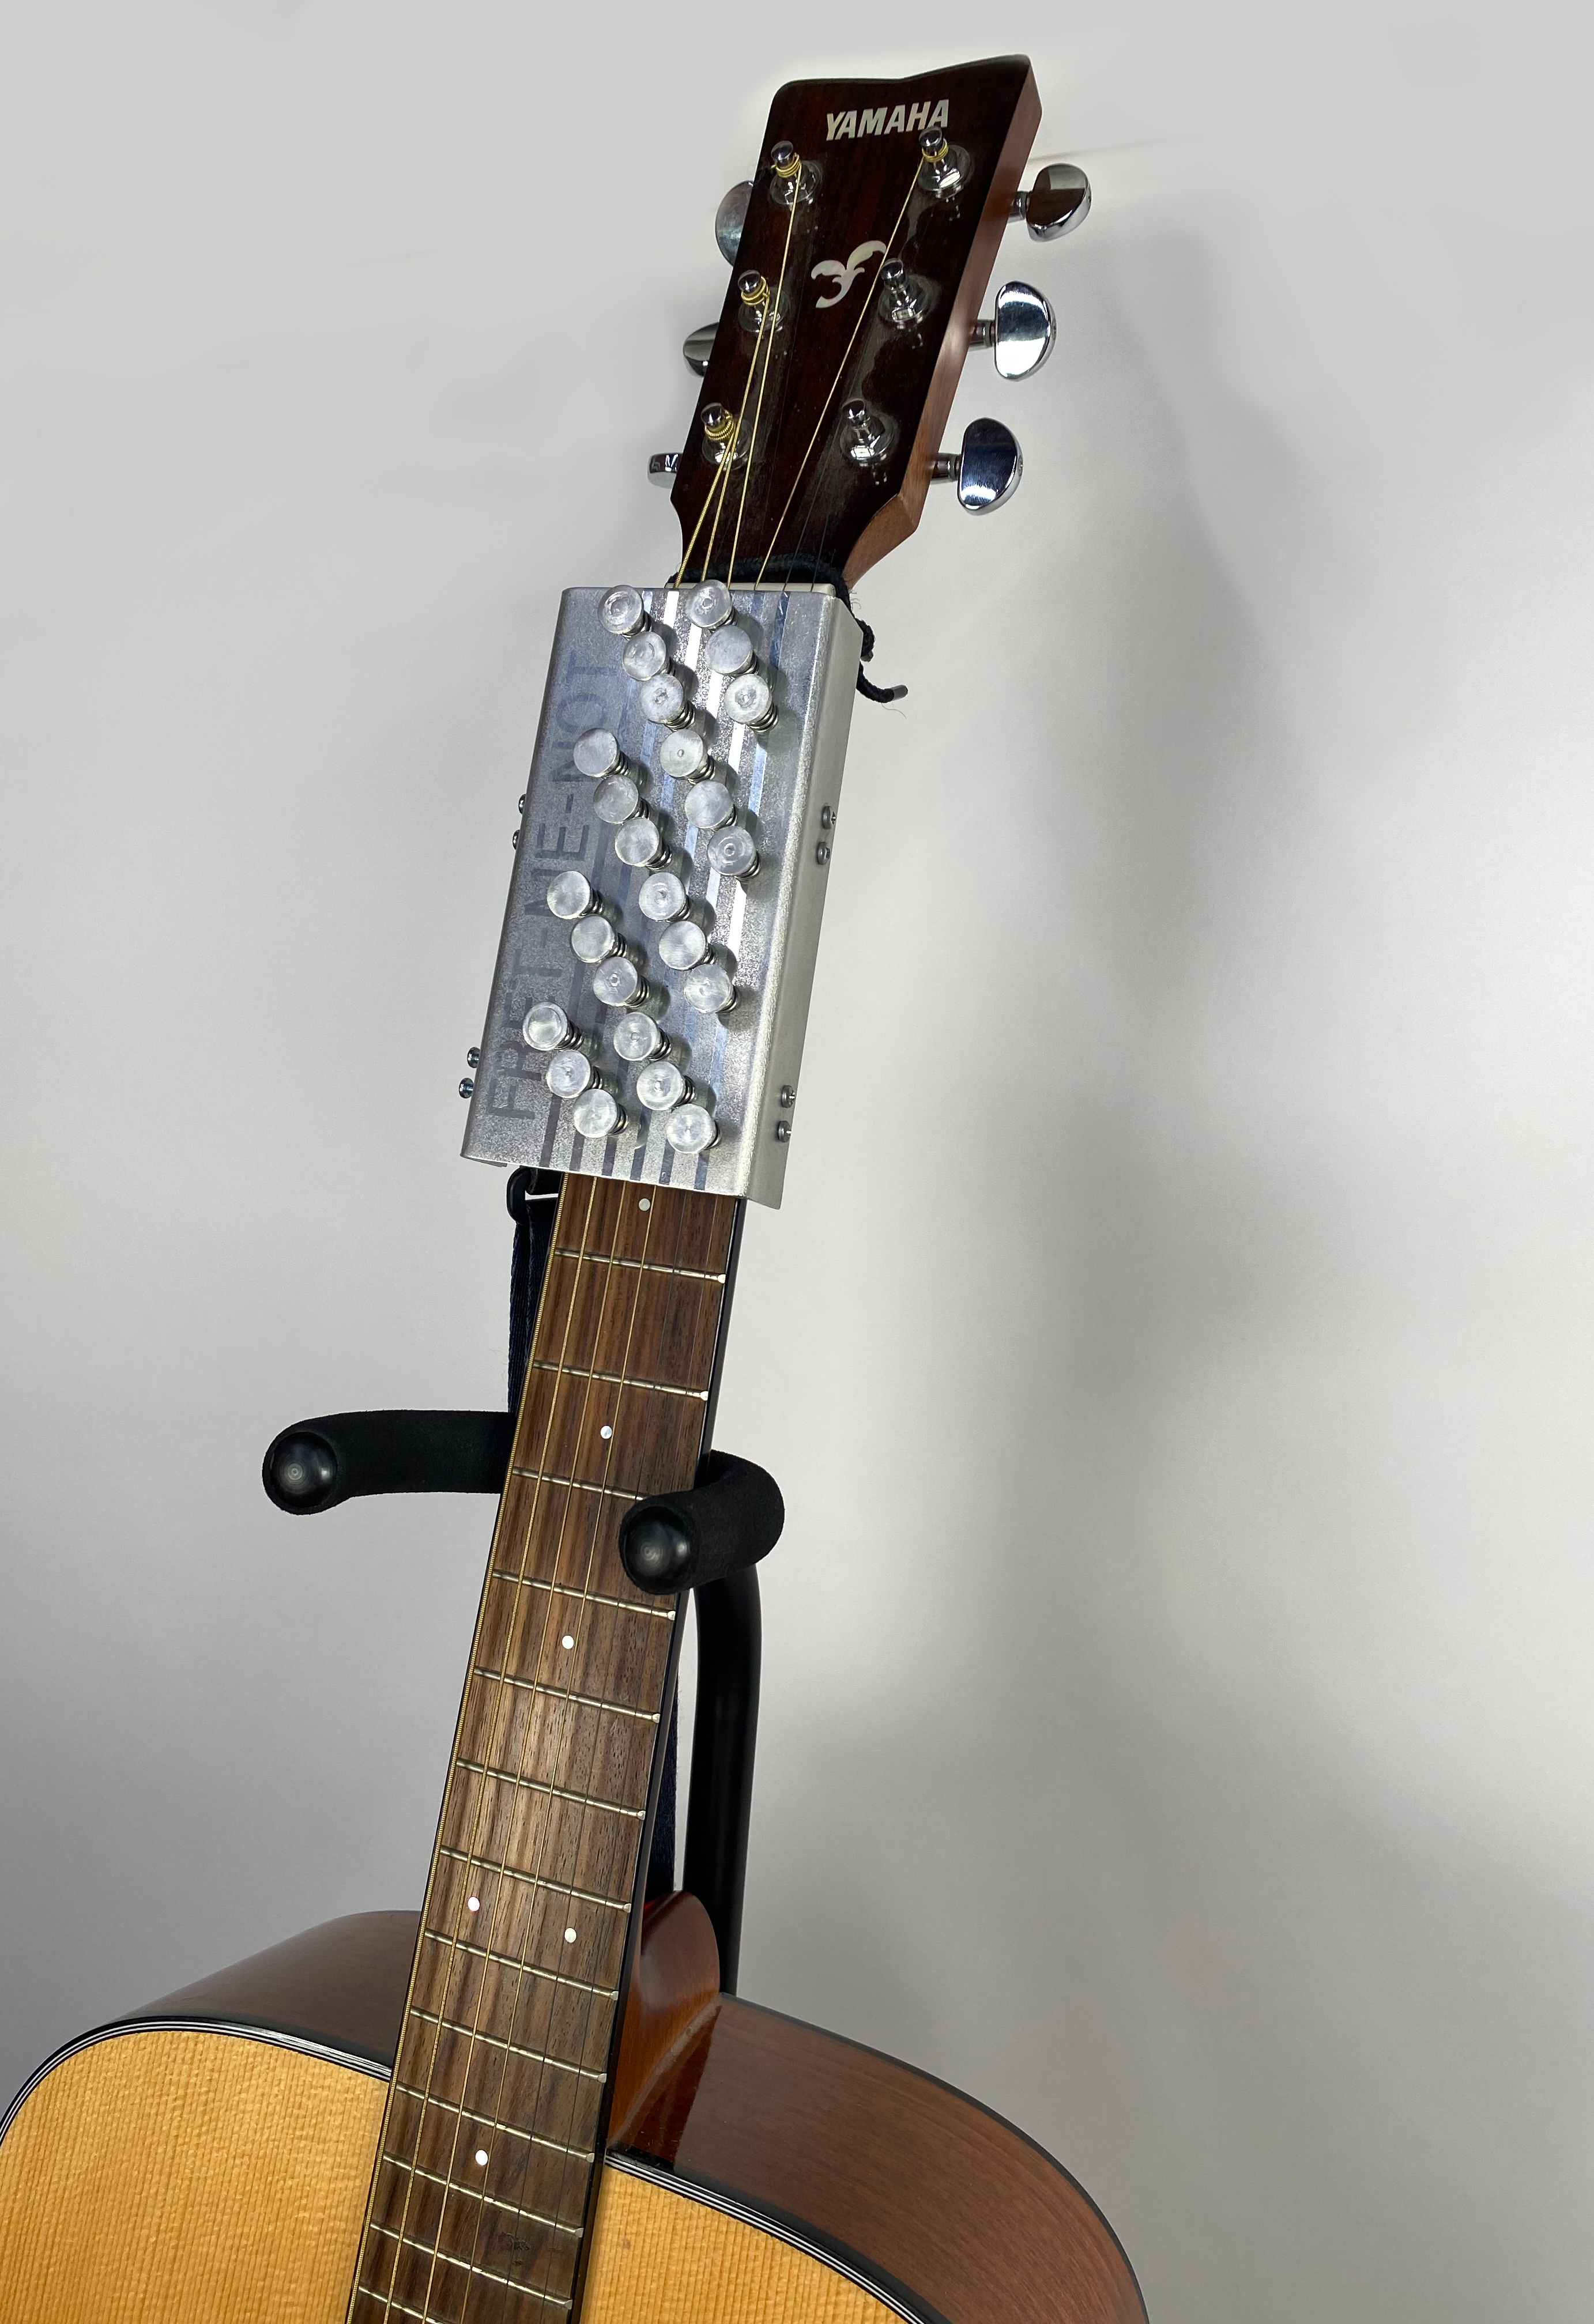
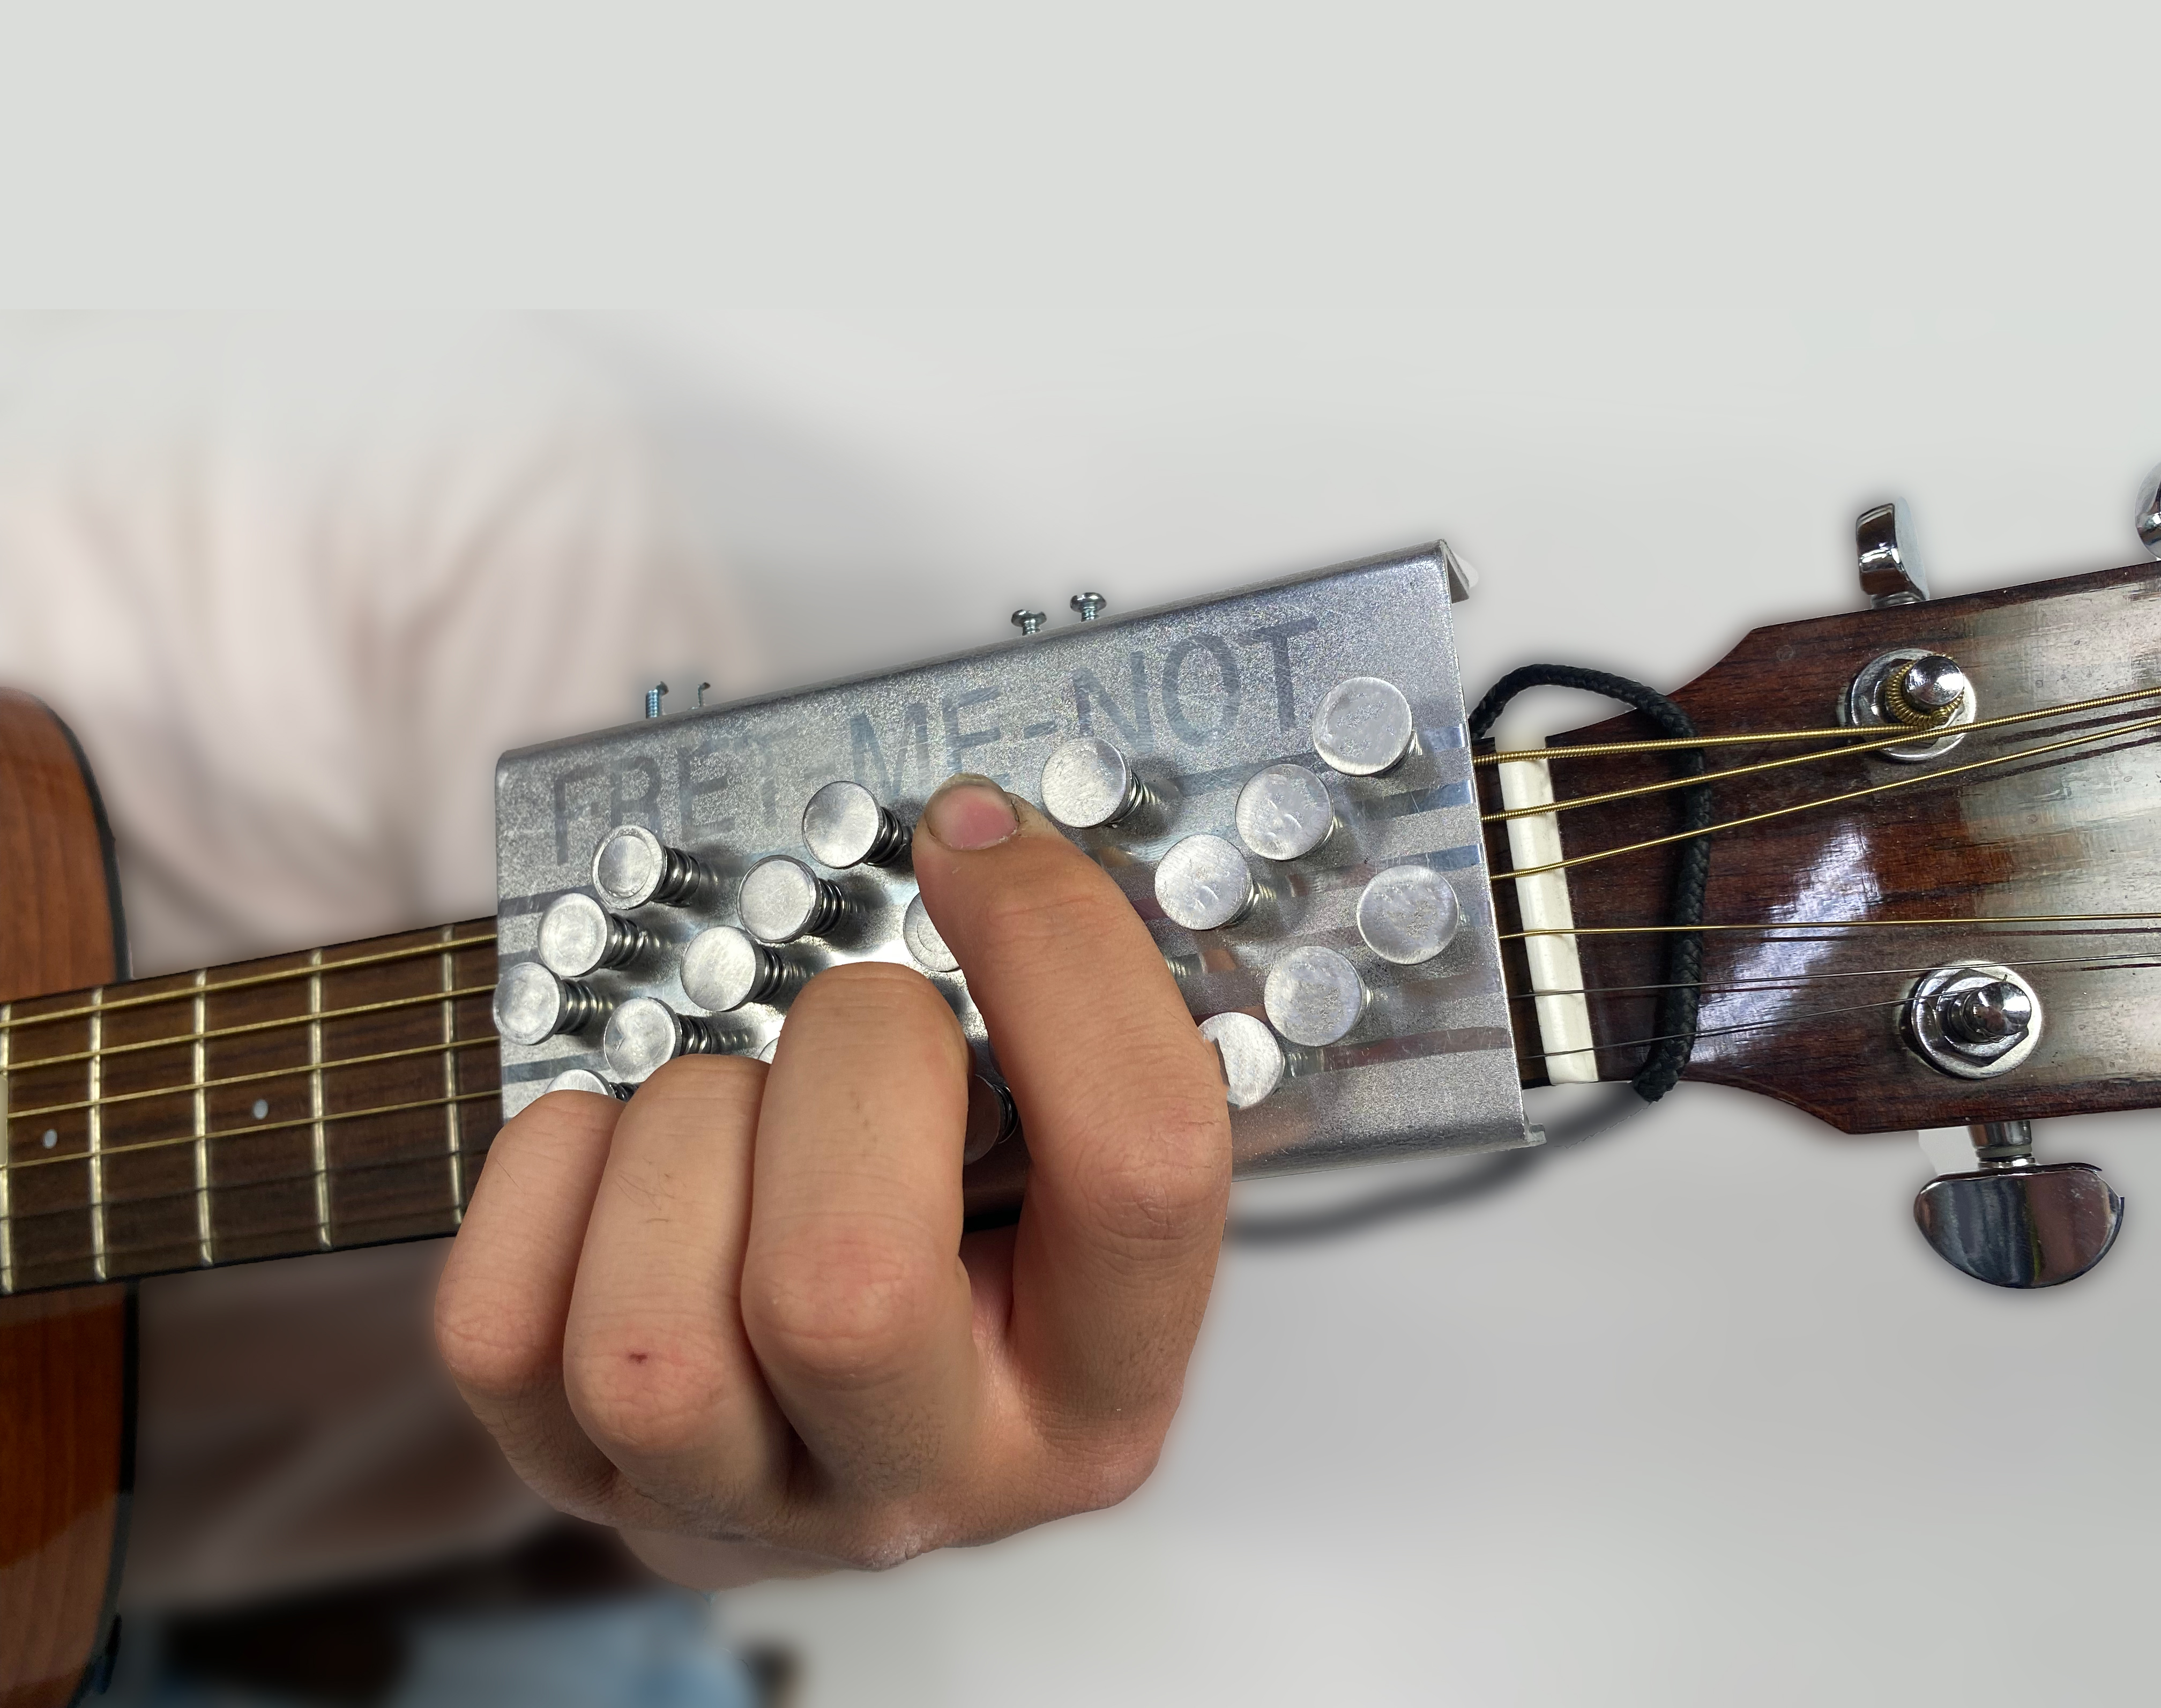
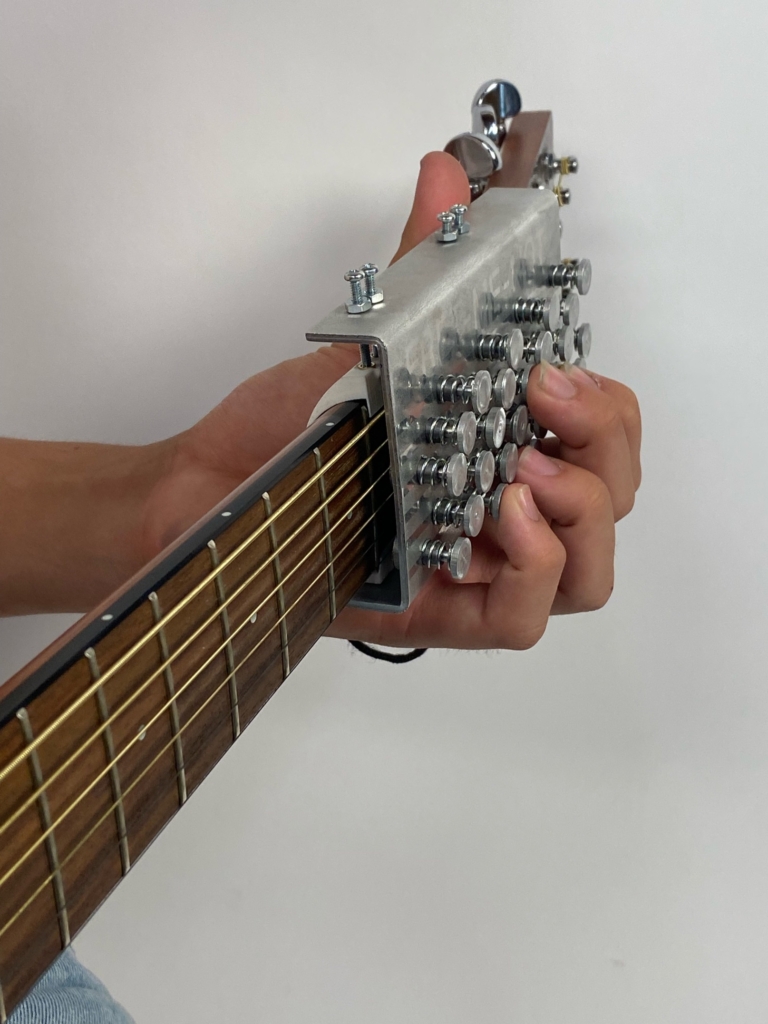
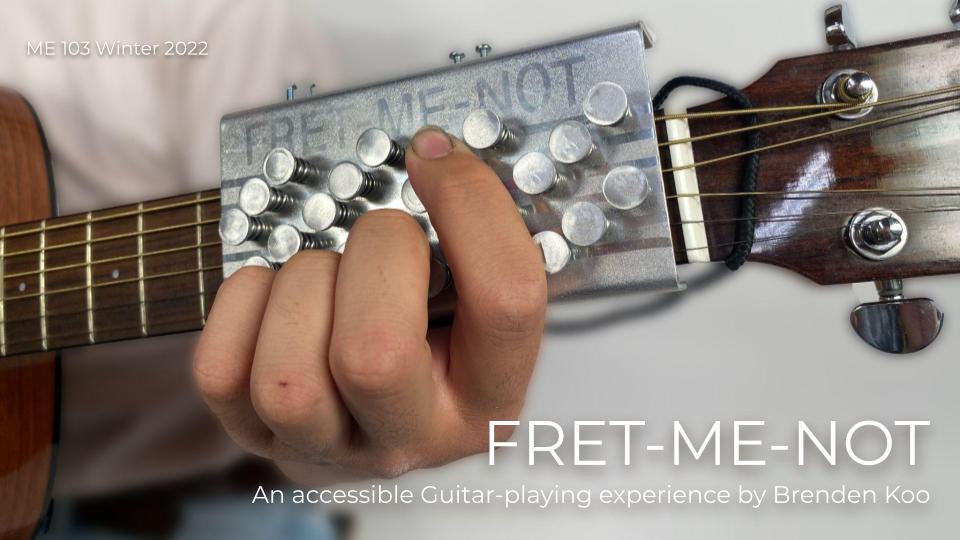
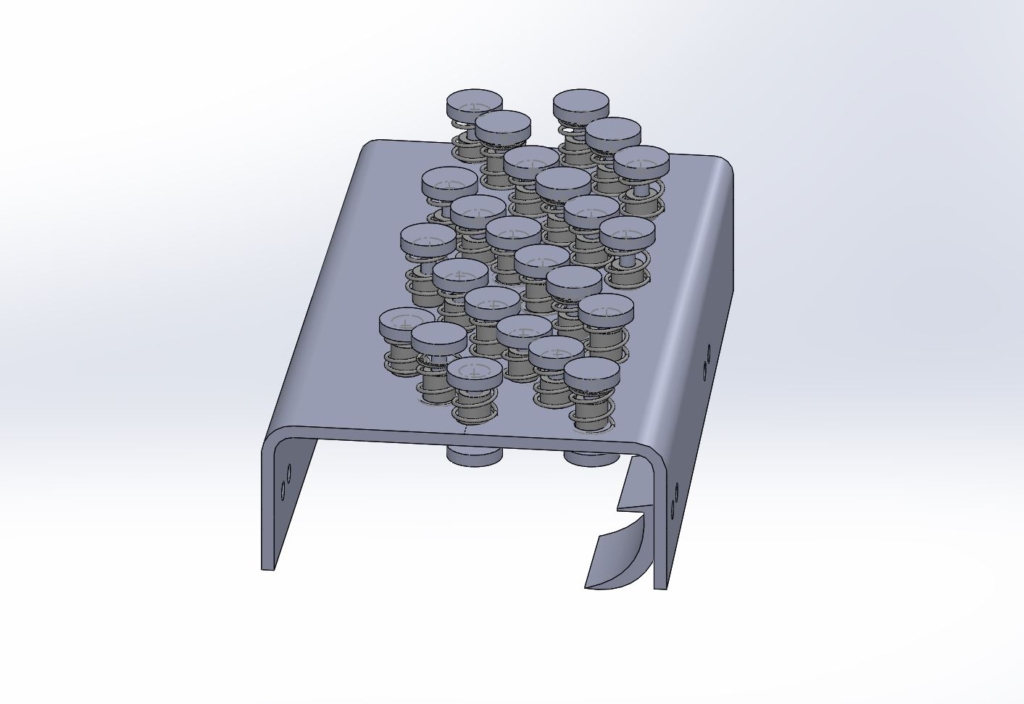
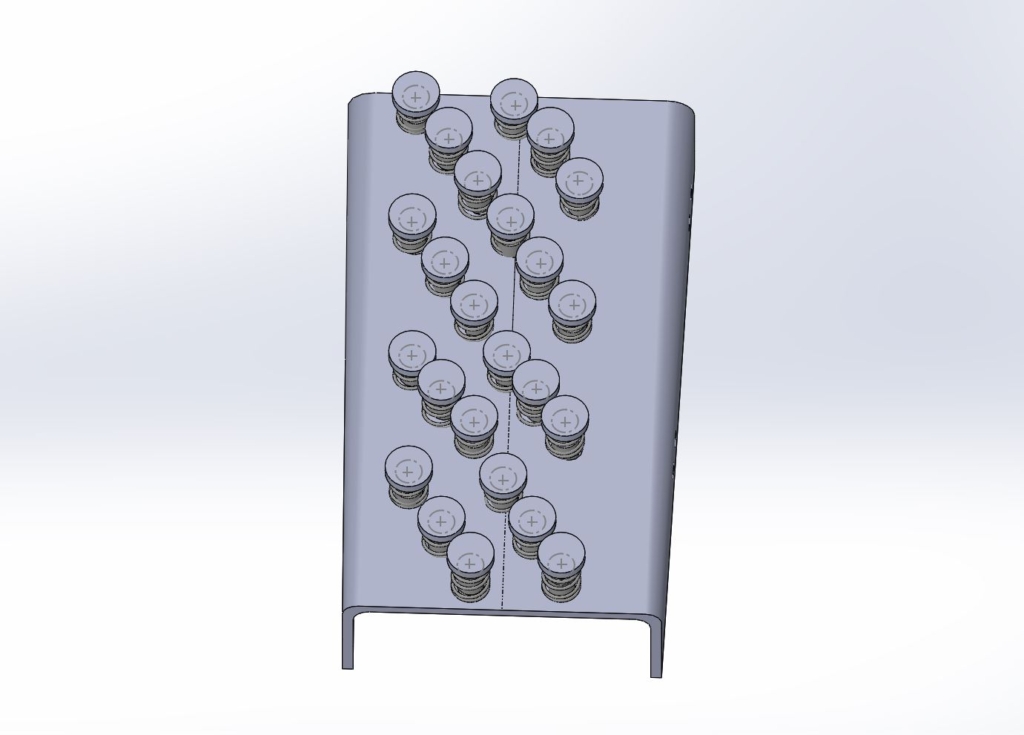
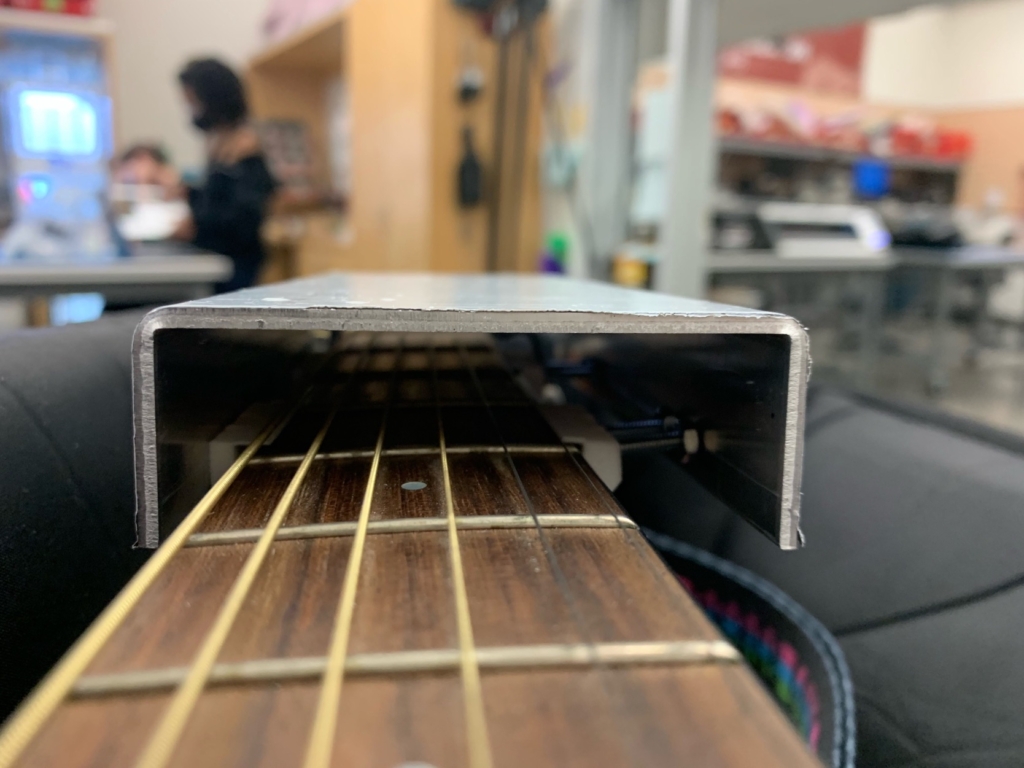
As a result, I designed the Fret-Me-Not, which is a guitar attachment that allows anyone of any physical capability to play the guitar. What I really appreciated about this project was the opportunity to have full autonomy over the product from the obtaining of raw materials to designing the assembly of the product to the actual machining processes. The Fret-Me-Not functions by screwing onto the neck of the guitar with a set of four 3D printed clamps. There are 24 hand-turned buttons spring-loaded into bearings that are press-fit into a sheet of aluminum. Each of the buttons are positioned in four groups of six, so that there could be one button on each of the six strings for the first four frets. The idea behind the product is that the user is able to press the smooth buttons of the product to activate the strings, avoiding the callouses caused by the harsh textures of the guitar strings.
Designing the Product
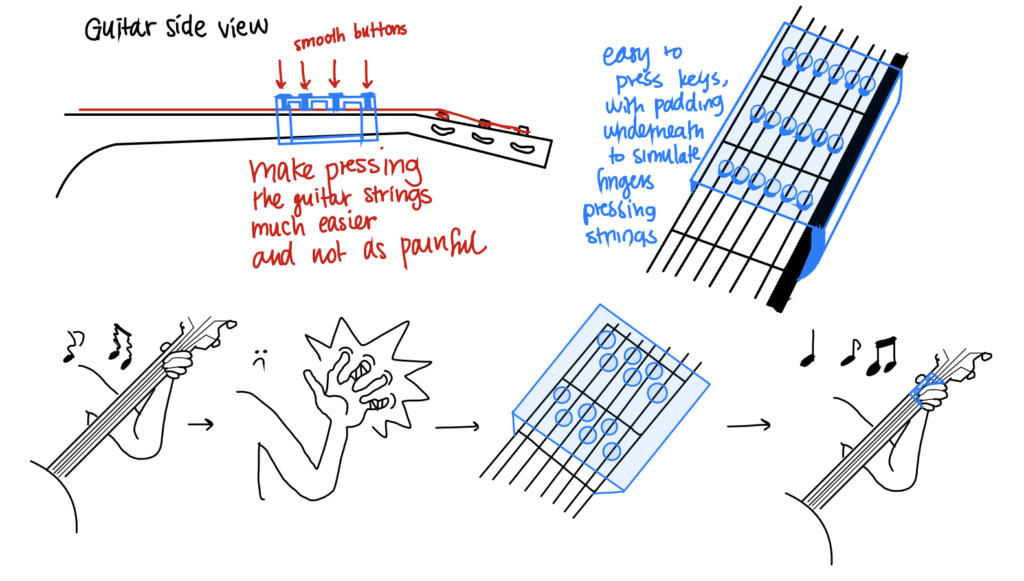
From the start of the project, my brainstorming process involved the usage of spring-loaded buttons for the Fret-Me-Not. Since the Fret-Me-Not is a tool designed for beginning guitarists, I made the executive decision to position the product in the first four frets of the guitar, where most of the common guitar chords are located. It is for the same reason that I designed the Fret-Me-Not to be in a fixed position connected to the neck of the guitar. Although it is not a permanent fixture, it is not something that will be flimsy or fall off while playing the guitar.
The questions that I was posing to myself at this stage of the process were whether the product should be secured to the neck of the guitar via a string-loaded mechanism (not unlike a capo) and which material should I use?
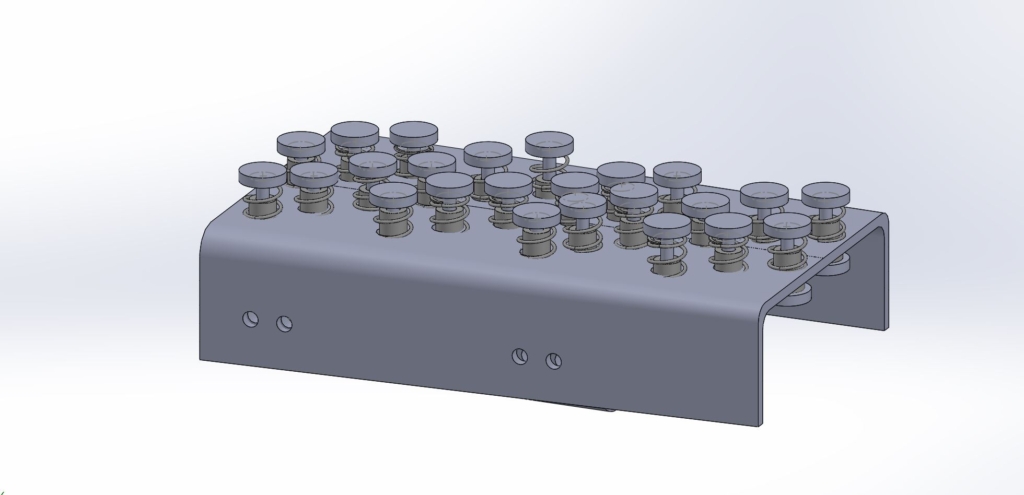
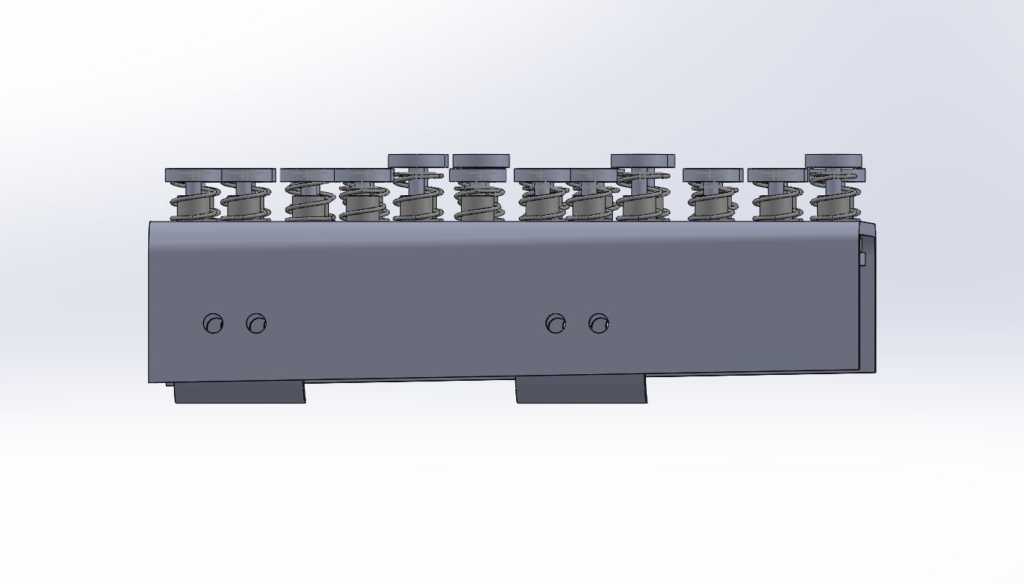
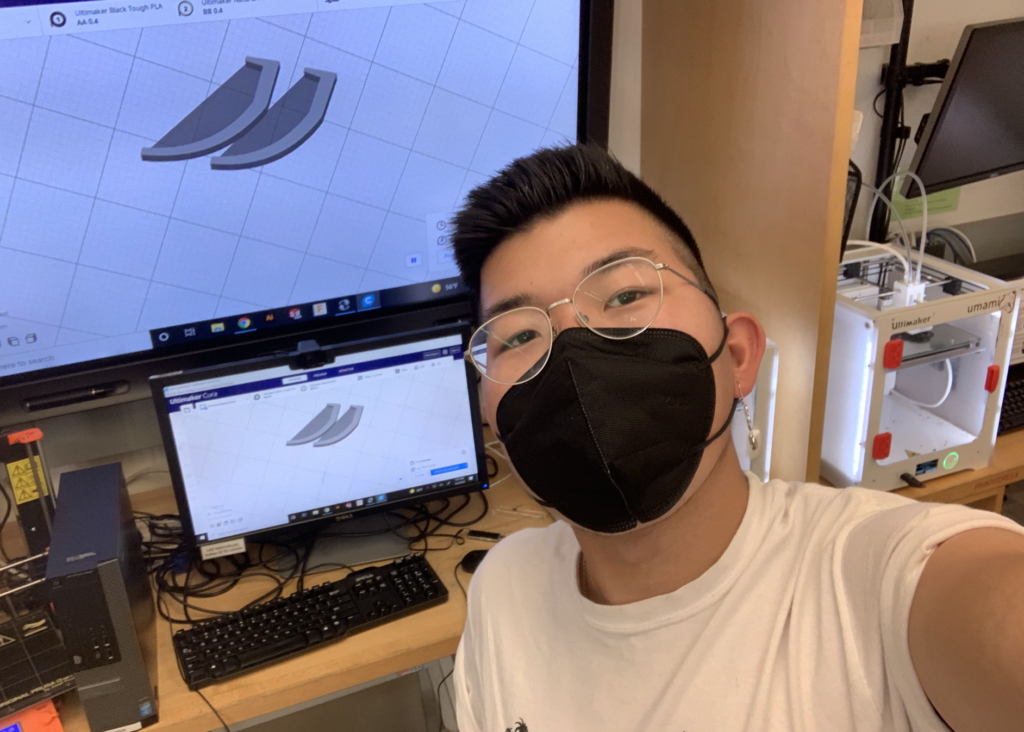
CAD Models
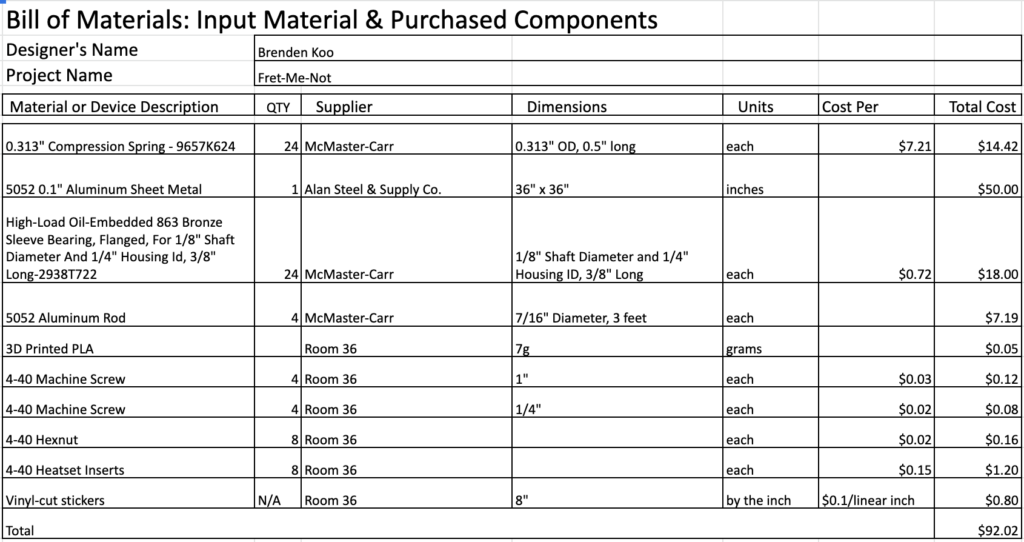
Bill of Materials
Prototyping and Machining
I wanted to push myself through this experience by using the following machining processes: Turning with Lathe, Sheet Metal Bending, Press-Fitting, 3D Printing, Bead Blasting, Sanding, Polishing. The materials I used in the product are Aluminum, Bronze, and Zinc-Plated Steel.
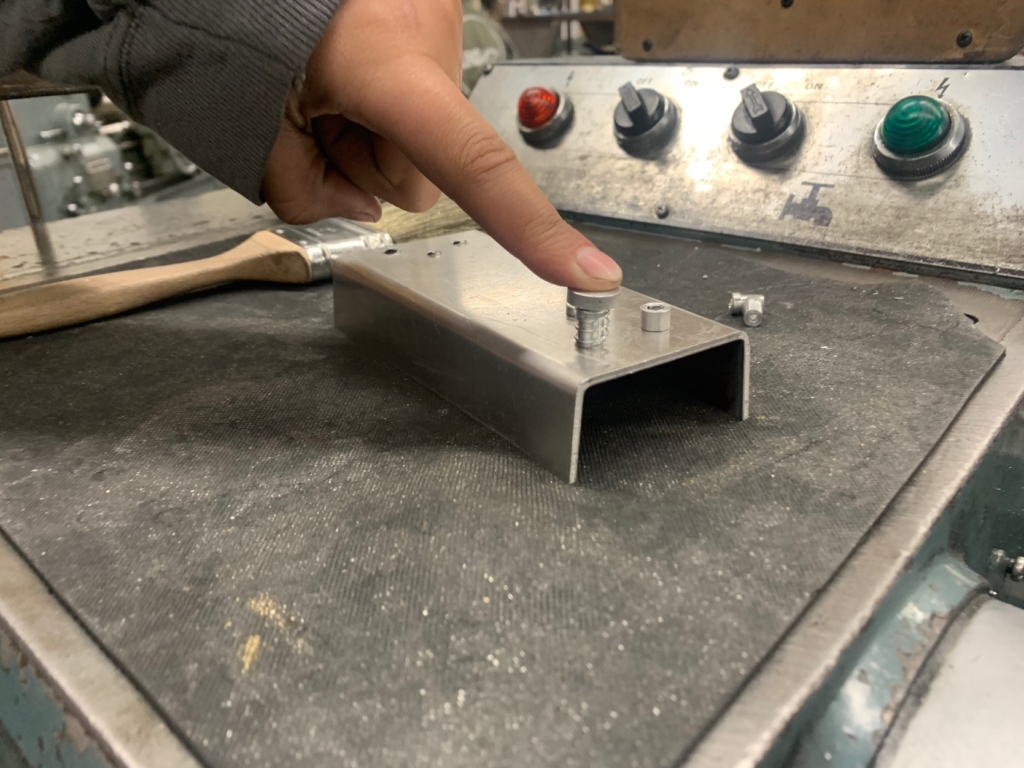
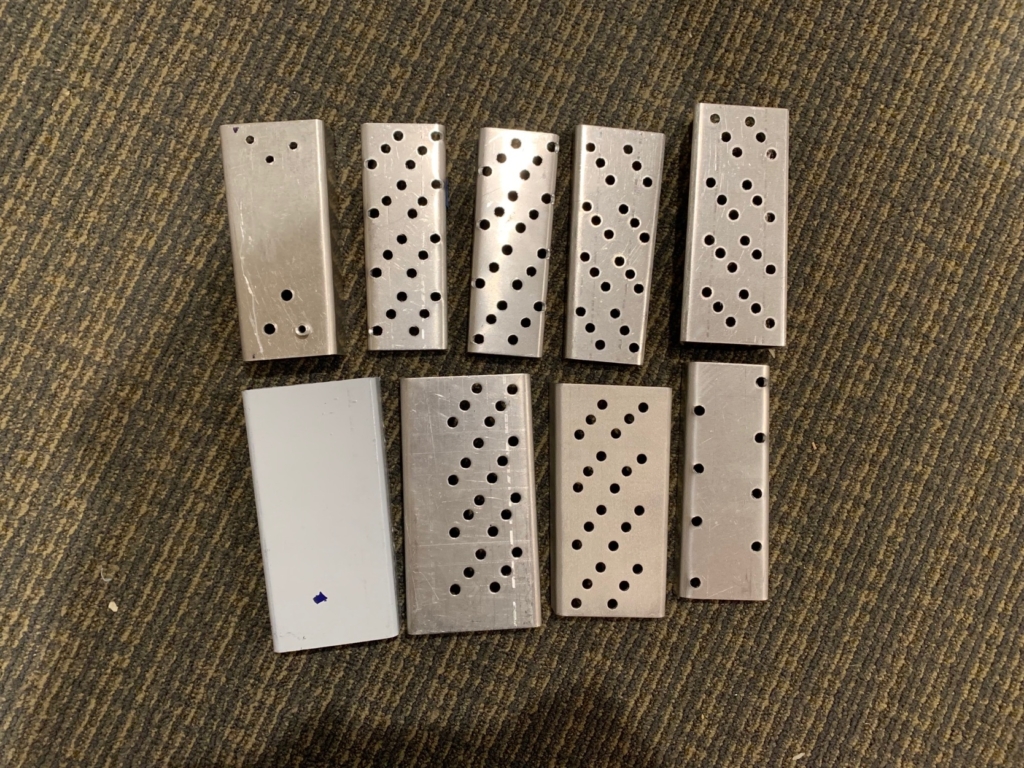
I faced a number of difficult challenges during this project. I had a lot of issues with the specific dimensions: I didn’t know how high above the guitar strings the buttons should be situated. I didn’t know how far apart the buttons should be from one another so that they could each interact with a different string on a different fret without pushing down or muting other strings. I didn’t know how wide the bent piece of aluminum should be, since I wanted it to be attached to the neck of the guitar but didn’t want it to be physically constrained to, and potentially damage, the wood. I ultimately iterated 9 different “less-successful” versions of my prototype before finally arriving at my final design.
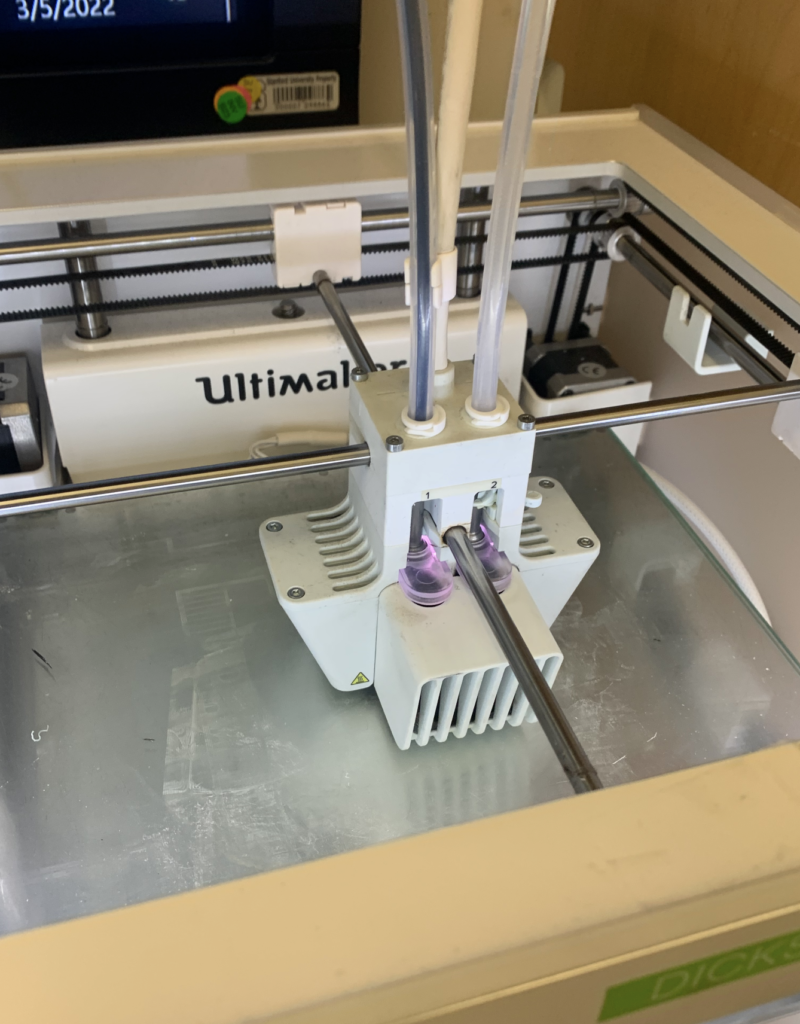
I also had an issue with how the product would secure to the neck of the guitar. With the help of the ME 102 Professor, Dan, and my ME 103 coach, Jack, I designed 3D-printed clamps that would screw into the side of the guitar without the screws breaking through to the wood. In order to do so, I had to model the neck of my guitar in SolidWorks in order to find the perfect angle for my clamps be able to constrain the product properly.
Another challenge had to do with tedium. Since I was designing a product with 24 identical buttons, I was doing a lot of scaled manufacturing. I had to spend hours upon hours hunched over the lathe in the Stanford Product Realization Lab doing the same repetitive actions turning and threading the tiniest stock of aluminum. I had to machine identical buttons to be the same exact dimensions, and make sure to be delicate so as to not deflect or damage the material. I had to make sure to give a hundred percent of my attention to the lathe, so that I wouldn’t accidentally mess up my dimensions or prematurely part the material. I was able to streamline the entire process to ensure that, even though I was turning and threading each of my buttons individually, I could effectively and efficiently machine them as a whole in a relatively quicker period of time.
Final Iteration and Finishing Touches
After figuring out all of the dimensions of my product, I then assembled everything together. I cut out vinyl stickers to resemble the strings of the guitar and to read out the words “FRET-ME-NOT”. I then stuck these vinyl stickers onto the base of my product, and then I bead-blasted the part to have a nice finish on my product. Following this, I carefully (careful so as not to ruin the finish or the piece itself) press-fitted my bearings into my bent piece of sheet metal and placed the springs on each of the bearings. I sanded the tops of the buttons to create a uniform finish across the top, and then screwed these buttons into the little discs that would interact with the strings of the guitar. I then screwed in my clamps and secured the product to the neck of the guitar, as intended.